


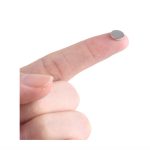
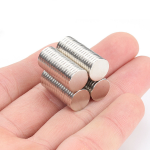
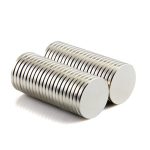

On our product pages, we list the Pull Force of a magnet as we’ve measured it using specific test conditions. A good, comparative measure of a magnet’s strength is Pull Force Case 1. This is the force you need to pull a single magnet directly away from a large, flat steel plate.
Wait a second, you say, a pair of magnets seem stronger. How can we say this? Well, first and foremost, because we’ve measured it many times.
It might seem like a pair of magnets is stronger for two reasons: one, if you’re sticking a magnet to a very thin or small piece of steel, you will see a pull force weaker than our listed Pull Force Case 1.
Two, a pair of magnets that are some distance apart will pull with more strength than a single magnet at the same distance to a steel plate. At a distance, Pull Force Case 3 is usually greater. When touching, however, it is equal to Pull Force Case 1.
A similar description can be found in our FAQ.

What magnets can be used to repel each other and hold up 10 pounds?
To repel each other and hold up 10 pounds, you’d want magnets that are both strong enough to provide the necessary lifting force and have the right orientation to repel each other. Let’s break this down:
Key Factors for Choosing Magnets:
Magnet Type: The strongest type of permanent magnets are neodymium magnets (also called rare-earth magnets). These are known for their high magnetic strength relative to size.
Magnetic Force: Magnets are rated based on their pulling force or lifting capacity. For your purpose, you’ll need magnets with a pull force of at least 10 pounds (4.5 kg) or more. Typically, the pull force is measured when the magnet is in direct contact with a flat ferromagnetic surface, so the actual force when repelling will be lower.
Magnet Size: Neodymium magnets come in various sizes, and the size of the magnet directly impacts its pull force. The larger the magnet, the stronger the force. However, you also need to consider how to position the magnets for repulsion (since you want them to repel each other).
Pole Orientation: To ensure repulsion, you’ll need to align the like poles (north to north or south to south). When the like poles face each other, the magnets will exert a repulsive force.
Recommended Magnet Types for Your Scenario:
Neodymium (N52) magnets are one of the strongest options. The “N52” refers to the grade of the magnet and indicates high strength. For example, a 1-inch diameter N52 neodymium magnet can have a pull force of up to 20-30 pounds depending on the specific shape and thickness.
Disc or Cylindrical Magnets: A 1-inch diameter, 0.25-inch thick neodymium disc magnet of N52 grade should easily handle the 10-pound repulsion requirement. These magnets are small, but because of their high strength, they can exert a significant force.
How to Set It Up for Repulsion:
To repel the magnets, you will need to place like poles facing each other. For example, place the north pole of one magnet facing the north pole of another magnet.
The magnets should be positioned close enough so that their magnetic fields can interact strongly but far enough apart to generate a noticeable repulsive force.
Additional Considerations:
Magnetic Field Strength: If you’re planning to use the magnets to hold up weight in a specific direction (e.g., hanging), make sure that the geometry of the setup allows the magnets to repel with enough force to counteract gravity and hold the 10-pound load. This may involve using a pair of magnets or incorporating some mechanical design to ensure stability.
Safety: Neodymium magnets are incredibly strong and can be dangerous if not handled carefully. They can snap together with enough force to break or injure fingers, and if they are close enough, they can shatter. Be sure to handle them with care and use proper protective gear when working with them.
Summary:
Neodymium magnets (especially N52 grade) should work well for your need.
Choose a disc or cylindrical shape with a strong pull force of at least 10 pounds or more, like a 1-inch diameter N52 magnet.
Use like poles (north to north or south to south) facing each other for the magnets to repel.
Keep in mind that the configuration and distance between the magnets will influence how effectively they repel and hold the weight.
How to magnetize a screwdriver, or other steel objects
Magnetizing a screwdriver (or any other steel object) is a pretty simple process. Essentially, you’re aligning the magnetic domains within the material to create a strong, permanent magnetic field. Here’s how you can do it:
- Use a Strong Magnet (like a Neodymium Magnet)
The easiest way to magnetize a screwdriver is to use a strong permanent magnet, like a neodymium magnet. Here’s a step-by-step guide:
Step-by-Step Process:
Choose Your Magnet: Get a strong magnet, such as a neodymium (rare-earth) magnet, or any other powerful magnet you have.
Hold the Magnet in One Hand: Take the magnet and hold it firmly in one hand.
Stroke the Screwdriver: With the other hand, place the tip of the screwdriver (or the part you want to magnetize) against the magnet. Then, stroke the screwdriver along the magnet in one direction, about 10-20 times. Always stroke in one direction only—don’t rub back and forth. This helps align the magnetic domains in the steel.
Test the Screwdriver: After stroking the screwdriver a few times, test it by trying to pick up a small metal object, like a screw or a nail. If it’s magnetized properly, it should attract the object.
Strengthen the Magnetization: If the screwdriver isn’t magnetized enough, repeat the process. A stronger magnet (like a neodymium magnet) or more strokes will help increase the strength of the magnetization.
- Use an Electric Current (For Temporary Magnetization)
If you want to magnetize the screwdriver temporarily or experiment with stronger magnetization, you can use electricity to create a magnetic field. This method is based on electromagnetism.
Step-by-Step Process:
Get Some Wire: Get some insulated copper wire and strip the ends to expose the metal.
Wrap the Wire Around the Screwdriver: Take the wire and tightly wrap it around the metal shaft of the screwdriver. Try to make around 20-30 coils around the shaft (the more coils, the stronger the magnetization).
Connect the Ends of the Wire to a Power Source: Connect the exposed ends of the wire to the terminals of a battery (usually a 9V battery works well). When current flows through the wire, it will create a magnetic field that magnetizes the screwdriver.
Remove the Power Source: After a few seconds of current flowing, disconnect the battery. The screwdriver should now be magnetized.
Test the Magnetism: Check if the screwdriver can attract small metallic objects. This is a temporary magnetization method—if you disconnect the power or leave the screwdriver unused for a while, the magnetization will weaken.
- Hammer Method (For a Quick Magnetization)
Another option is to hammer the screwdriver while it’s in contact with a strong magnet. This method is more forceful and can be a bit hit-or-miss, but it works by physically aligning the steel’s domains with a powerful shock.
Step-by-Step Process:
Place the Screwdriver on a Strong Magnet: Set the screwdriver on a strong magnet (like a neodymium magnet) with the tip in contact with the magnet.
Tap with a Hammer: Gently tap the screwdriver with a hammer while it’s in contact with the magnet. The shock will help align the magnetic domains in the steel, leading to magnetization.
Test the Magnetism: Test it by trying to pick up a small metal object.
Why Does This Work?
Magnetism in steel objects (like screwdrivers) is created by aligning tiny magnetic regions called domains within the metal. Normally, these domains point in random directions, so the object doesn’t have a noticeable magnetic field. By rubbing the screwdriver with a magnet or using an electric current, you align the domains, creating a permanent (or temporary, depending on the method) magnetic field.

Notes to Keep in Mind:
Material Type: This works best with ferromagnetic materials like steel (not so well with aluminum, copper, or plastic).
Permanent vs. Temporary: Using a permanent magnet (like a neodymium magnet) usually results in a more permanent magnetization, while using a current (electromagnet method) results in a temporary magnetization.
Care: Be cautious when handling strong magnets (especially neodymium magnets). They can snap together with a lot of force, potentially causing injury or damaging the magnet.